29 April 2008

Cheddar and Cauliflower Gratin with Almonds

We've been entertaining a lot recently, which means that instead of our usual shopping cycle, we've been buying and cooking for crowds, and then spending the rest of the week nibbling whatever odd concoction of leftovers we find ourselves with. Frittatas have made good use of whatever vegetables are lying aound, accompanied by the random piece of lamb from the most recent party. I don't want to sound like a socialite- we do not normally entertain like this, it's just that there's been this event and that, and a group of friends visiting, and one going away, and so we've found ourselves in this entertaining cycle.


The problem is when entertaining leaves us with an imbalance of leftovers- a fridge filled with 3 huge hunks of cheese, a 6 pack of Leffe, 2 lemons, half a stale baguette, and a few bottles of Champagne. Besides feeling like a lush, every time I open the fridge I think guility about those two huge wedges of sharp cheddar someone kindly brought to one of our parties. My first instinct was to make macaroni and cheese, but goodness I do need a vegetable in my life, so I decided to swap out the pasta for cauliflower. The result is pretty much the same as the classic French cauliflower gratin- both of which involve cauliflower covered in a classic white sauce enriched with cheese and baked.

It was, in the way that anything smothered in cheese should be, delicious. I topped it with some slivered almonds for crunch, and it's filling enough for a simple dinner or light enough as a side dish. If your guests leave you with a different type of cheese as leftovers, I bet this would be good with another combination- say gouda and hazelnuts, or goat cheese and walnuts.


Cheddar and Cauliflower Gratin with Almonds
Make sure not to overcook the cauliflower, as no one wants mushy vegetables in their gratin.

1 head cauliflower, separated into florets
2 tablespoons flour
2 tablespoons butter
1 1/2 cups milk
1 1/2 cups grated cheddar cheese, divided
salt, red pepper to taste
3 tablespoons slivered almonds

1. In a pot of boiling water, cook the cauliflower for about 3-5 minutes, until crisp-tender. Do not overcook, drain in a colander and rinse under cold water to stop cooking.
2. Melt the butter in a saucepan. Stir in the flour and whisk gently over low heat until light brown. Stir in the milk and cook, stirring, over medium heat until the mixture thickens, about 5-7 minutes. Stir in 1 1/4 cups of the cheese, season with salt and pepper, and set aside.
3. Preheat oven to 350 F, grease a casserole dish. Place cauliflower florets in the casserole, pour cheese sauce over top. Sprinkle with remaining 1/4 cup cheese. Bake for a total of 25-30 minutes, sprinkle the almonds over the top in the last 5-10 minutes of baking.

24 April 2008

Earl Grey Cupcakes with Lemon Buttercream

I still make my cakes by hand, with a bowl and a good heavy duty fork. I know, I'm a total luddite. But I actually like making cakes and cookies this way, there's something so first-hand about the process. Besides, as I told a friend the other day when he asked why I didn't have a stand mixer; I have to have something left to register for if I ever get married! Joking aside, I think that making cake by hand gives you a much better understanding of each step of the process: creaming together butter and sugar you can feel when the texture lightens under your finger tips, beating in the eggs one by one (important!) you can feel each one emulsify and thicken as it combines with the sugar. If you let a machine do all that, you'd have a much diminished understanding of the cake-making process.


I've gotten into the habit of bringing cupcakes to work fairly often (every other Friday, to be precise) and each time I make them I'm reminded how much I enjoy the process, and also how good homemade cake is. There's nothing special about this cake recipe, in fact, it's your completely classic 1234 cake. I'm not one for the fancy-cupcake trend that is taking over America, but one cannot make the same cake all the time, so I often take the basic recipe and spice it up with whatever suits my mood. In this case (courtesy a brainstorming session with a colleague over what flavor cupcakes to make this week, ahem, what do you mean "work-related" emails?), I made earl grey tea cupcakes with a lemon buttercream.

I made a standard back-of-the-box American buttercream because people love the stuff, but to my taste it's a tad too sweet, even with the addition of plenty of lemon. Mind you, I still licked the frosting spatula, but I might play with a lemon-meringue or lemon-cream cheese frosting in the future. Whatever you choose, I like this so much I'd even make it as a layer cake.


The hardest part is taking all those cupcakes on my 25 minute train ride to work. The solution: pack the cupcakes, unfrosted, in several flat plastic containers. Place the frosting in a piping bag or Ziplock bag and place in a plastic cup or other container. Transport to work, then snip the edge of the frosting bag and frost the cupcakes at your destination- super easy and little mess!


Earl Grey Cupcakes with Lemon Buttercream
I know you'll be tempted to make this using whatever variety of tea is sitting in your pantry. Please use earl grey, its floral citrus note is wonderful in these cakes. For extra oomph you can even add a tablespoon of earl grey tea leaves to the frosting. Makes 24 cupcakes, easily halved.

1 cup (1/2 lb) unsalted butter, at room temperature
2 cups sugar
4 eggs
3 cups self-rising flour
1 cup milk
2 bags or 2 tablespoons earl grey tea

1. Preheat the oven to 350 F, fill 2 cupcake pans with paper liners or grease well. In a bowl (or with a stand mixer), beat the butter until creamy. Add the sugar and cream the butter with the sugar until it is light and fluffy. Add the eggs one at a time, beating each egg very well so that it is thoroughly combined before adding the next egg. Beat in half of the flour along with the tea. Then add the milk and the remaining flour, stirring until just combined.
2. Fill the cupcake pans 2/3 full. Bake 20-25 minutes, rotating the pans halfway through to ensure even baking. Cool thoroughly before frosting.

Lemon Buttercream

1 cup (1/2 lb, 2 sticks) unsalted butter
1 lb (4 cups) powdered sugar
zest of 1 lemon
3 tablespoons limoncello or lemon juice

1. Cream the butter until smooth, gradually beat in the powdered sugar until the mixture is very fluffy. Zest the lemon over the bowl into the frosting, add the lemon or limoncello, stir until smooth. Spread or pipe the frosting on cooled cupcakes. Please remember buttercream should be served at room temp.

19 April 2008

Kubbe

If I could write a cookbook from the ground up, I'd want to travel all over the towns of Kurdistan, from the mountains of southern Turkey to the Tigris in Iraq to northern Iran, and collect their recipes. I want to know more about malthoum and kebab kishkash, about the wheat harvest in Mosul and mountain cheeses. This region is a great reminder that the borders of the modern Middle East were mainly drawn by arbitrary lines sketched on a map, and there are a lot of different ways to view the Middle East along ethnic, religious, and even culinary or linguistic lines.


My introduction to the diversity of this region came while living in Damascus, where I spent a good amount of time with a Christian family that hailed from Hasake and Qamishli, in the far northeastern corner of Syria. The Kurdish region stretches from it's western tip in Aleppo, Syria through Turkey, Iraq, and the it's eastern edge in Iran. Western media seems to paint this region simply as Kurdish, but in reality it's a fascinatingly beautiful part of the world that has long been home to a wide variety of ethnicities and religions: there's Armenians and Arabs, Yazidis and Zoroastrians, a large Christian population, including Assyrians and Chaldeans, and the region had a sizeable Jewish population before 1948. I had two Kurdish friends in Damascus who regularly conversed in Sorani and introduced me to colorful Kurdish textiles and fiercely flavored red pepper dip. We went to a concert of Kurdish music held at the French Embassy one evening (Kurdish music and gatherings are banned from public venues in Syria), and I saw old men cry at the joy of being able to share their beautiful songs.

The cuisine of Kurdistan is rich with the influences of Arab, Armenian, and Persian cooking, and it's also terrifically unexplored. The most famous dish from this region is kubbe, a meat-stuffed dumpling poached in broth. As the name implies, kubbe is related to kibbe, the Middle Eastern meat and bulgur dumplings (or patties, or casserole, depending on the incarnation). Similarly, there are many variations of kubbe- some people make the dumpling shell with a mixture of bulgur and semolina, some use all semolina, others add some matzo meal or use ground rice. The broth always has a slight tart element to it but it can vary from a simple lemony chicken broth to a saffron broth to a tomato-tamarind broth favored in Iraq or even a plum-flavored soup in Iran.

Ever since I first made kubbe, kneading about 20 pounds of dough with two other women on the floor of a Damascene apartment, I've been collecting kubbe recipes and tips. These days I make an all semolina dough and stuff it with a lamb mixture brightly spiced with parsley, dried fruits and pine nuts. A homemade chicken stock with a good dose of fresh lemon juice and a pinch of saffron (if I'm feeling plush) makes the base of the soup. You don't have to have any interest in Kurdish cuisine to love kubbe, there's something universally appealing about these dumplings in warm lemony broth.

Kubbe is very popular in Israel, where it was brought by Jewish immigrants from northern Iraq, it's similarity to matzo ball soup makes it a popular choice for Passover, which begins tonight. If you want to make it for Passover, use matzo meal in the dough, as semolina is hametz.

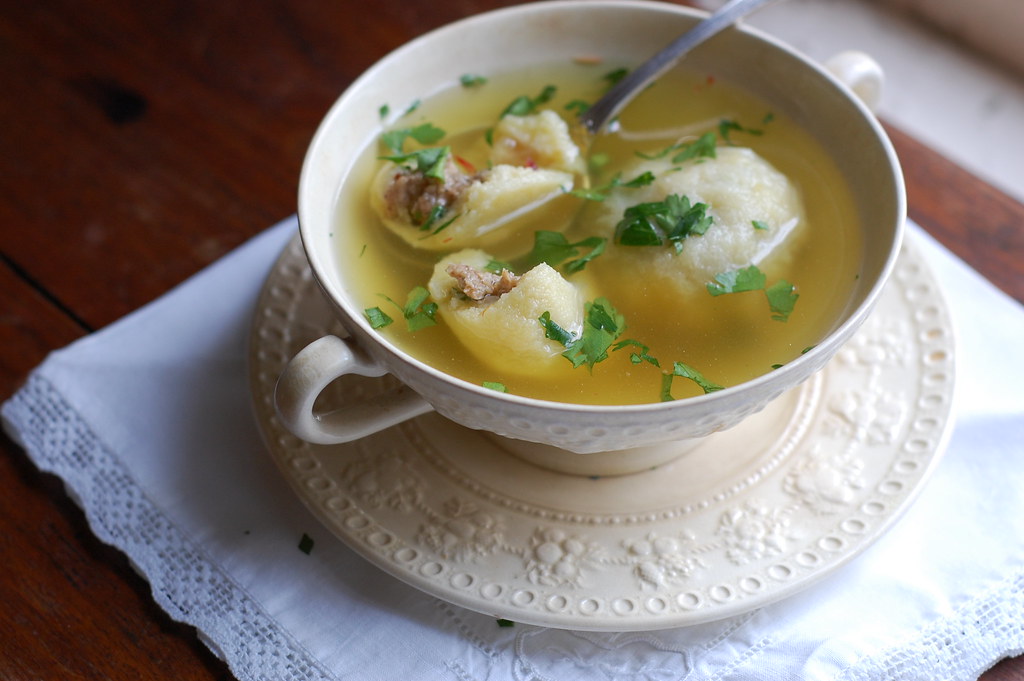
Kubbe (Meat-Stuffed Semolina Dumplings in Broth)
Though the dough can seem difficult to work with at first, in reality it's quite forgiving, if it tears merely patch it with another bit of dough. I've made this for vegetarians using vegetarian sausage and vegetable broth (heresy, I know!) and even avowed carnivores couldn't tell the difference. Makes about 4 main-coarse servings.

for the dough:
2 cups fine semolina (semolina flour, often found in the pasta aisle, works perfectly)
1/4 cup flour
pinch salt
1 cup hot water
for the filling:
1 small onion or shallot, diced
1 lb lean ground lamb (you can also use beef)
1/4 teaspoon each cinnamon, allspice
1/4 cup chopped dried cherries, currants, or cranberries
1/2 cup chopped parsley
2 heaping tablespoons pine nuts or chopped slivered almonds
for the broth:
6 cups good homemade chicken stock
1/2 cup fresh lemon juice
a pinch of saffron
salt, a tiny bit of red pepper to taste
chopped parsley for serving

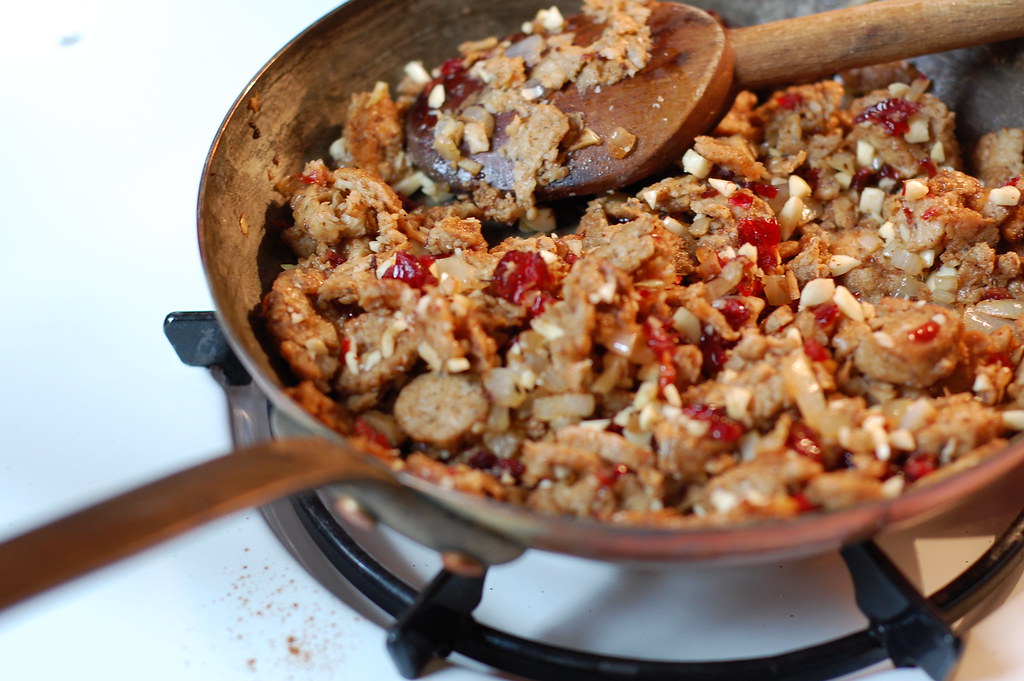
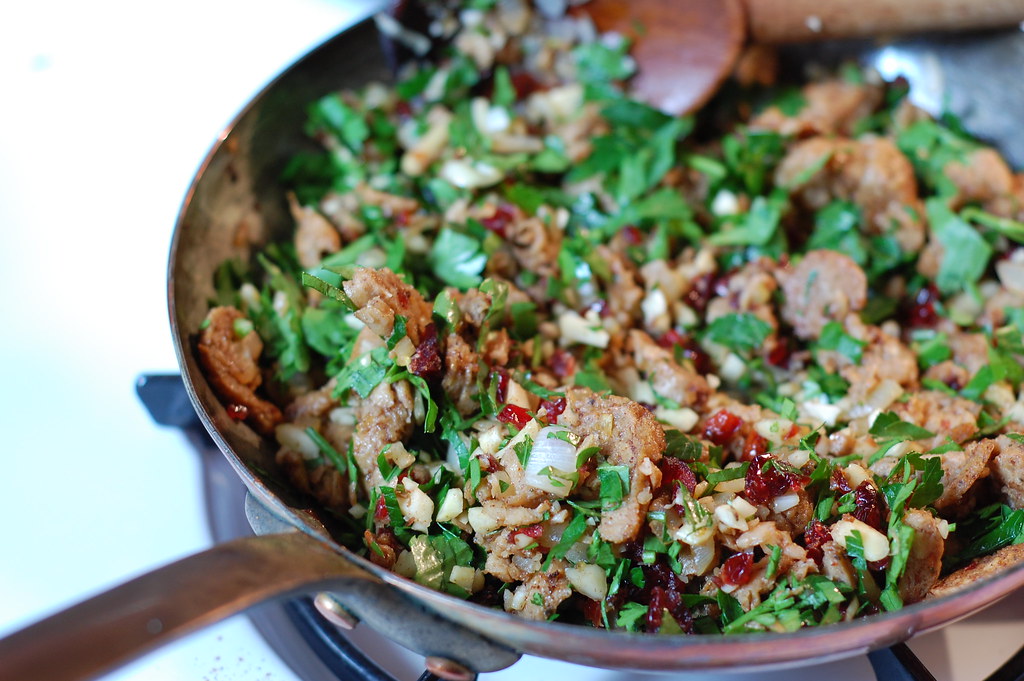
1. Make filling: Heat some olive oil in a saute pan. Add the onion and saute until softened, a few minutes. Add the ground lamb, season with salt and cook over medium heat, breaking up the pieces, until it is nicely browned, 10-15 minutes. Stir in the cherries and pine nuts in the last few minutes of cooking. Stir in the parsley to combine and then remove from the heat.
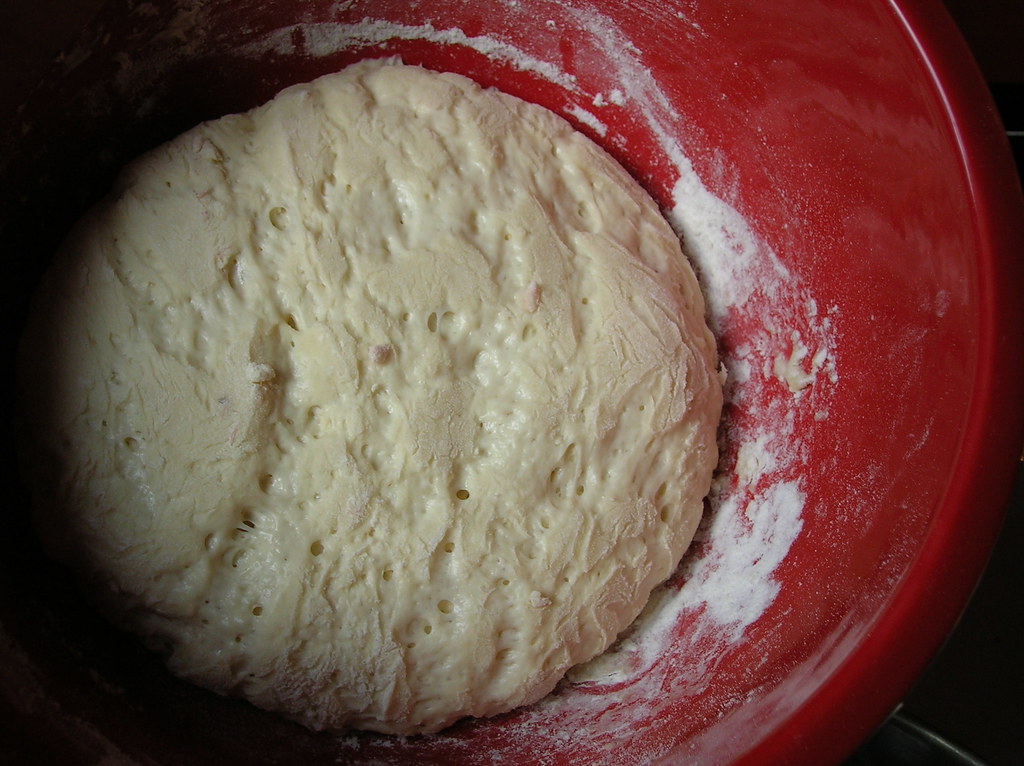
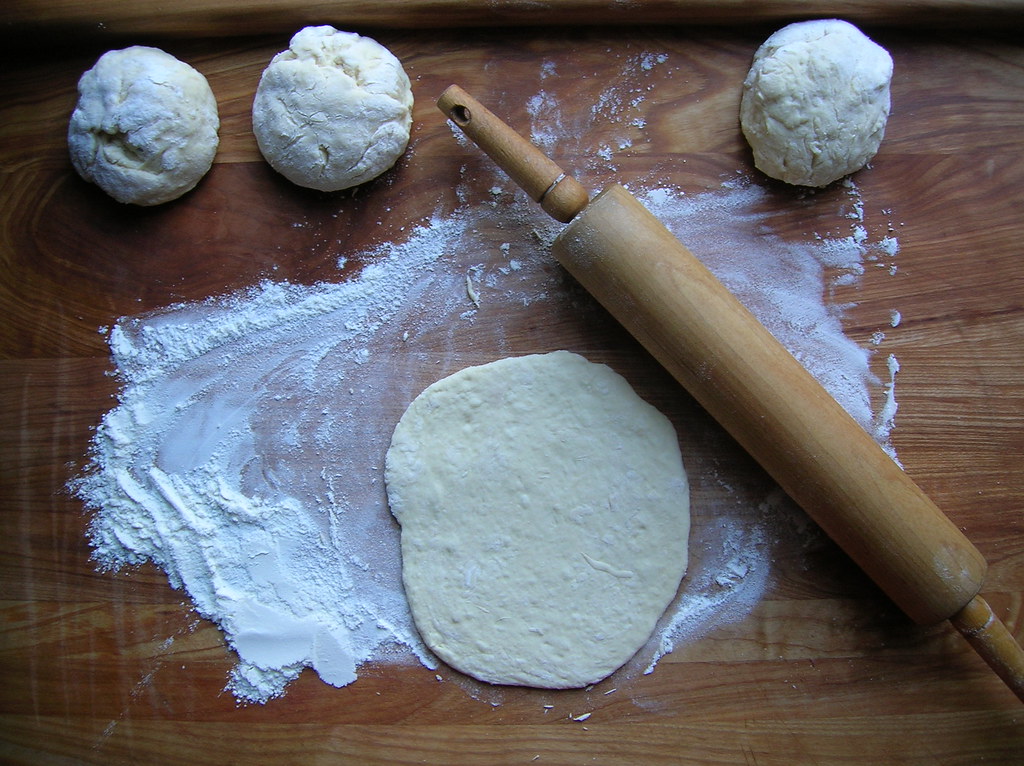
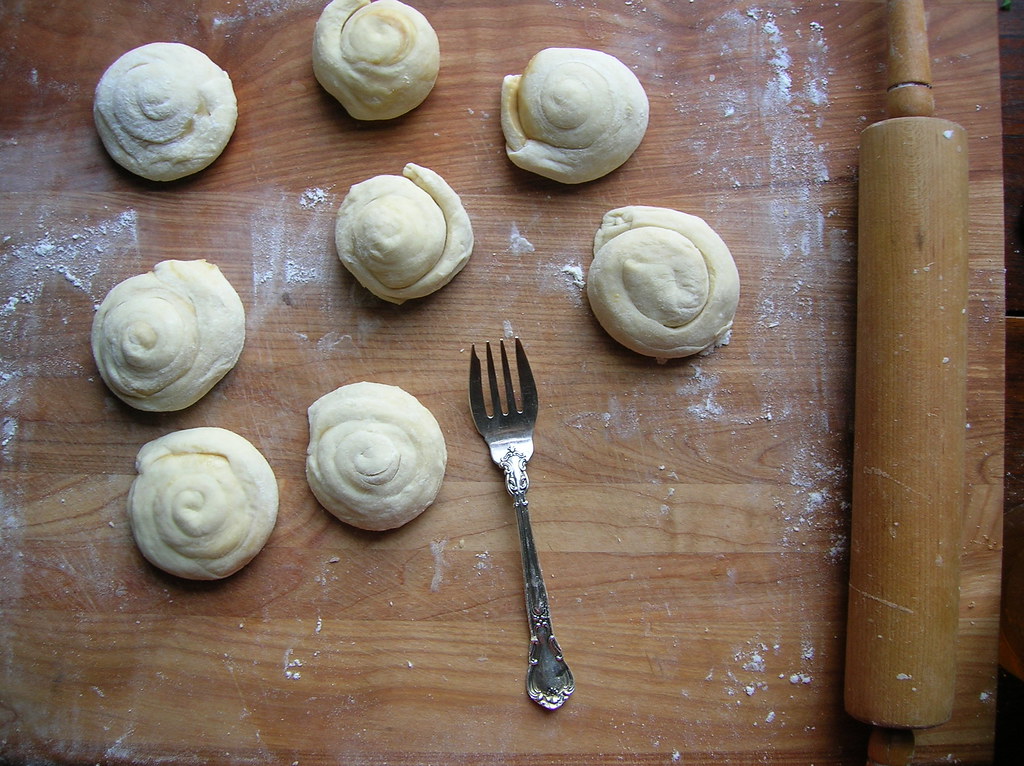
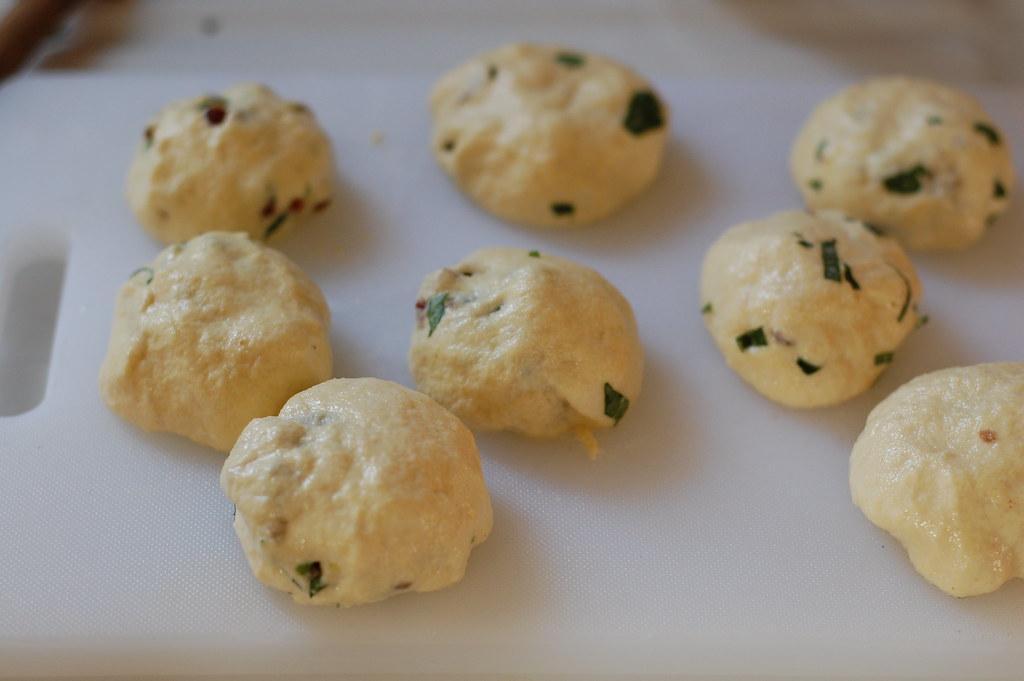
2. Make dough: mix together semolina, flour, and salt in a bowl. Gradually mix in hot water, stirring with a fork, until the consistency of playdough. Add a touch more water if necessary. Let rest 15 minutes. Knead the dough again (I do this by pressing it around with a silicone spatula) until pliable. Working with damp hands, take a walnut sized piece of dough and flatten it in your palm. Place a small spoonful of the meat mixture in the center, then close up the dumpling and roll it around between your palms. Your goal is to have a very thin shell encasing a good portion of meat, but this takes some practice. Continue forming dumplings, always keeping your hands damp to prevent sticking.
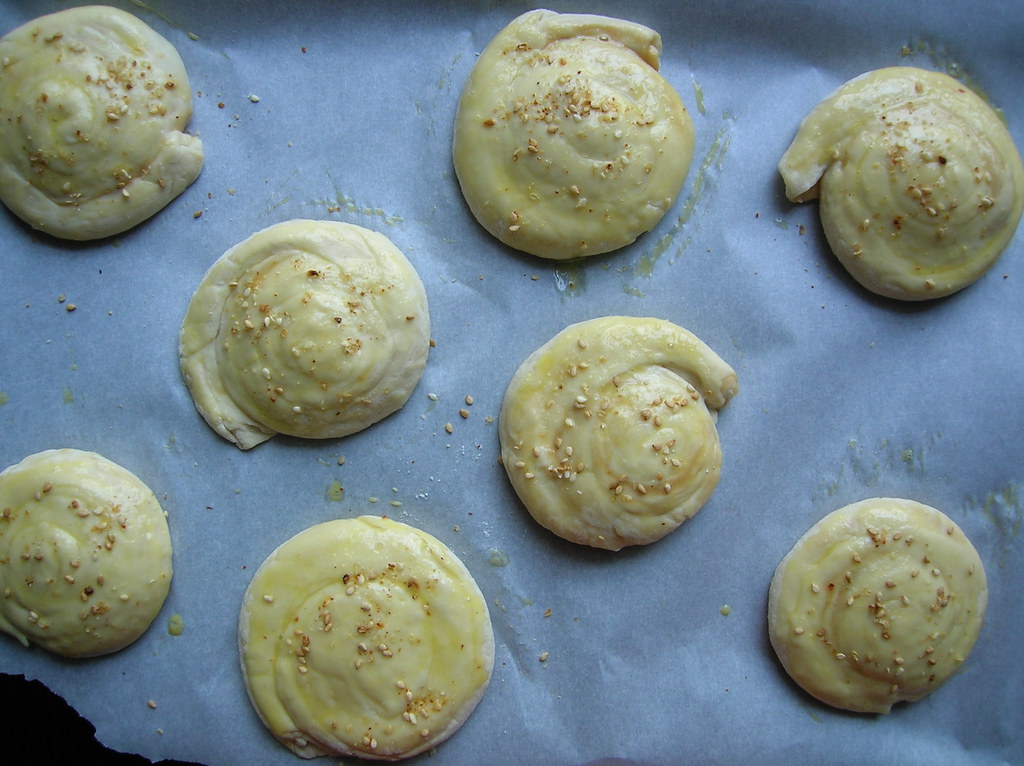
3. Bring a pot of water to boil, lower the heat so the water is just simmering. Poach the dumplings in the water (you may have to do this in batches) for 15 minutes. The dumplings may float before this, but they need the full 15 minutes for the semolina to cook. Remove with a slotted spoon.
4. While the kubbe are poaching, bring chicken broth to a simmer, add the saffron and season to taste. Stir in the lemon juice. Add as many kubbe as you are going to serve to the broth (reserve any extra dumplings separately), and let reheat for 1-2 minutes. Place a few kubbe in a bowl, ladle the broth over top. Sprinkle with parsley and serve.
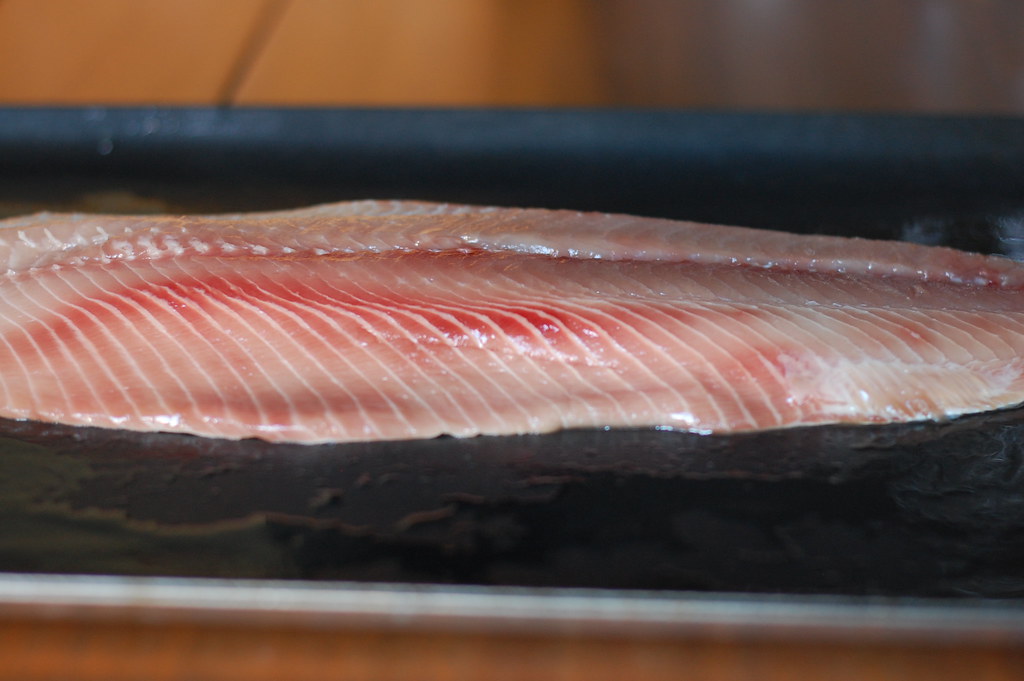
14 April 2008

Oven-Barbequed Shad

As much as I complain about D.C. and oh, I do, I have to admit, the city really shines in the spring. While New York has the market cornered on fall, with the fire of autumn leaves blazing across Central Park, it's as if D.C. were built just for spring. Thank goodness for Lady Bird Johnson, whose beautification campaign scattered seeds all over the city, because I've never seen so many daffodils, hyacinth, tulips, and fosythia abloom in one place. A friend and I went for an excursion in Georgetown and we couldn't tell whether the houses had been painted to match the blossoms or vice versa. And though we complain about the tourists, the cherry blossoms scattering their confetti-like petals over the ground, their branches echoing the graceful white curves of the Capitol, are truly beautiful.

It's still a bit too early for asparagus and peas and such, but ever since March the fish monger at Eastern Market has been carrying that most local harbinger of spring, shad. [And if there's anything I really love about DC, it's that fish guy at Eastern Market, with his bright yellow coveralls and salt and pepper beard.] Shad is a fresh-water fish found in rivers from Morrocco to Persia, from Ireland to the United States, where it plays a special role in Virginia election politics. Related to herring, shad spawn in the spring, running upstream much like salmon. Around these parts, shad are celebrated in the spring for their sacks of roe, which when pan-fried constitute a quintessential delicacy.

However, I was excited to see shad fillets because I've been reading about shad in Middle Eastern and Iraqi cooking, where the meaty flesh is prized for a sort of fish barbeque. When I asked the fish guy where the shad had come from, he told me they'd just been brought up from South Carolina, and then proceeded to give me a twenty-minute history of how shad fishing had changed in his lifetime. (It was quite interesting, but I'll spare you all the details). Another issue with shad is they can be quite bony, even the boned fillets are likely to have tiny pin bones that can be an annoyance when eating. Here, the fish guy gave me a great tip, cook the fillets in an acid (such as some lemon juice or some milk and butter) for a long time over a low temperature and the smaller bones will literally dissolve. Here's where I got excited because Iraqi's cook their fish with tamarind -another acid that could possibly serve the same purpose.

I can't speak to the scientific accuracy of the fish guy's claim, but I can tell you I made a sort of amalgam of his recipe and an Iraqi recipe and it was truly delicious. And barely a pesky bone in sight! Really, it was so good I'd urge you to seek out some shad, or try it with some salmon if you can't find shad. Even if it's still too cold for a proper barbeque, the shad, at least, is a real sign of spring.

Oven-Barbequed Shad
I realize that something slow-cooked in the oven doesn't really fit anyone's definition of barbeque, but that was the title of one of the recipes I adapted this from, and it seemed to perfectly capture the succulent fish and tangy-spicy-sweet onion topping.

1 large boned shad plank (1 1/4 lbs)
3 tablespoons lemon juice
3 tablespoons olive oil
2 large onions, thinly sliced
3 garlic cloves, sliced
1 teaspoon curry powder
1 teaspoon dried lime or lemon zest
1 teaspoon salt
3 tablespoons tamarind paste or balsamic vinegar
1 tablespoon tomato paste
1 cup warm water
1/4 cup chopped parsley

1. Preheat oven to 275 F. Place the shad in a greased baking dish, pour lemon juice over top and sprinkle with salt. Bake for 1 1/2 hours.
2. Meanwhile, heat the olive oil in a wide skillet. Add the onions and garlic and cook over medium heat, stirring frequently, until the onions begin to darken in color and caramelize, about 30 minutes. Stir in the water, curry, dried lime, tamarind, and tomato and cook another 5-10 minutes until the mixture is thick. Remove mixture from heat and stir in the parsley.
3. Spread the onion mixture over the fillet and return to the oven. Increase heat to 400 F and bake another 10-15 minutes, until the fish is done to your liking. Serve immediately, with a green salad and some bread.

12 April 2008

How To Make Labne

Labne (also labneh or lebni) is simply very thick strained yogurt. A staple across the Middle East, I've yet to find a version in the U.S. that compares to the labne I bought regularly over there, but luckily it's super-easy to make at home. All you do is strain your yogurt in a cheesecloth for about 24 hours until it's very thick. Of course, the better your yogurt the better your labne, so it's worth it to seek out a good local dairy, but I've made it with everything from homemade yogurt to store-bought Dannon.

There is a bit of confusion about labne consistency- it is somewhat thicker than the Greek yogurt sold in groceries, you should be able to spread labne on a piece of pita bread, but not as solid as cream cheese. There is also a version of labne which is strained so that it is thick enough to roll into balls, you might see these little yogurt cheese balls packed in jars of olive oil. However, if you were to walk into your average dairy or grocery and ask for labne, they'd hand you this wonderful spreadable stuff. It's pleasantly tart and tangy and prefect for drizzling with honey or jam, using in a sandwich, or using as a base for a cucumber and mint dip. I usually make a big batch of labne every other week, if I want a looser runnier yogurt for mixing with granola in the morning I simply thin the labne by gently stirring in a touch of water.

Labne
Make sure to use good plain yogurt with no additives and no stabilizers like gelatin (this will inhibit straining). You can use anything from fat free to full fat yogurt, the labne will be more or less rich as a result.

1. Start with 24 ounces plain yogurt. Stir the yogurt until completely smooth. Set a mesh colander over a bowl and line with cheesecloth or heavy-duty paper towels. Place yogurt in colander and leave to drain in the fridge for 24 hours, stirring occasionally to encourage even draining. The yogurt should be thick and spreadable, transfer to a covered container for storage.

Labne and Mint Sandwiches
1 sheet marquq bread (Lebanese mountain bread), or savory crepe or other very thin bread
labne
olive oil
fresh mint leaves
pitted black olives

1. Preheat a griddle. Spread a thick layer of labne over half the bread. Drizzle with olive oil, scatter mint leaves and olives over top. Fold bottom half of bread up over filling, then fold in half to form a triangle. Place sandwich on the griddle just to briefly toast each side. Slice sandwich in half into two smaller triangles, eat immediately.

05 April 2008

Flaky Sesame Rolls (Tahinli)


Having grown up in Baltimore and lived in both New York and Washington D.C. I’ve spent more time on Amtrak’s northeast corridor than anyone can imagine or should have to endure. Despite the fact that this should merit a medal of valor (I once joked that I was the curse that made every train I got on break down, including the time we had to dismount in the snow and walk on the train tracks to the nearest platform!) I actually still love the train. I also have an uncanny habit of always running into someone I know, often a collegaue or former classmate, which makes the time fly by.


Recently, I ran into a high school classmate of mine, both of us returning home briefly. When I mentioned my travels abroad, Lisa delighted, exclaiming her parents had grown up in Beirut and had wonderful memories of it and soon we were ensconced in a conversation of travels, languages, and cultures. I had always known Lisa was Armenian, but in the vague way you know things when you’re sixteen and think you know much more than you really do. Now, of course, I knew about the genocide her family must have fled, I’d visited the Armenian district in Beirut with its amazing goldmarket. But mainly, I knew about the great influence Armenian cuisine has had on the cuisine of the Middle East. And I couldn’t help thinking what great culinary knowledge her family might hold (is it bad that I see most people as a potential source of heirloom recipes?)


Armenian cuisine is most famous for its use a of red peppers and spices and also for its cured sausages, but one of my favorite Armenian contributions to Middle Eastern cuisine are the flaky sesame rolls known as tahinli. The rolls are made with a yeast dough which is rolled out, spread with sweetened tahini (sesame seed paste), then rolled up and twisted into coils, resulting in a wonderfully flaky texture and a nutty taste. Sesame bread rolls are popular all over the Middle East, sometimes the spirals are as large as a plate but I like them small dinner-roll size. If you imagine a flaky roll with a taste redolent of peanut butter, you’ll understand why I love them so much.

I never got to ask Lisa if her family made tahinli, but when I went home I dug up my own recipe and made them. Dunked in a homemade beet soup, or toasted for breakfast, they were gone before we knew it. And while I won't be thanking Amtrak any time soon, who knows what friend or recipe my next trip will turn up.


Flaky Sesame Rolls (Tahinli)

Dough:
3 1/2 cups flour, sifted
1 cup milk
2 1/4 tsp (1 envelope, 7 gr) yeast
1/3 cup olive oil
1 Tablespoon sugar
1 teaspoon salt
1 egg, beaten
Filling:
1 cup tahini
1/2 cup honey
Glaze:
1 egg beaten
sesame seeds

Directions
1. Combine the flour, sugar, yeast, and salt in a bowl. In a small bowl combine the egg and oil. Heat the milk to warm (120 - 130F). Add the milk to the flour mixture, then work in the egg mixture to make a smooth, elastic and not sticky dough. If needed add more flour.
2. Cover with a damp cloth and let it rest for 30 minutes. It will not rise like other breads, do not panic. Mix the filling ingredients while the dough is resting.
4. Divide the dough into 12 pieces, lightly grease them with a bit of oil so they do not dry out and make it east to roll. Let rest, covered, 15-20 minutes.
5. Preheat oven to 325 F. Roll one ball of dough out to very wide thin circle. Spread with a thin layer of the tahini mixture (I find it easiest to drizzle the tahini over, then sort of spread it with the back of the spoon). Starting at the longest edge, roll up the dough into a rope. Gently twist the rope so it is spiraled. Roll up the rope to a form a coiled bun. Gently flatten the bun with the rolling pin or a firm press of your hand. Place on a greased or lined baking sheet. Repeat with remaining dough.
6. Brush the rolls with the beaten egg, then sprinkle a few sesame seeds over top. Bake 25-30 minutes, until light brown.