31 July 2007

The Best Cashews, and Why I Love the Kurds

summer salad with melon and cashews
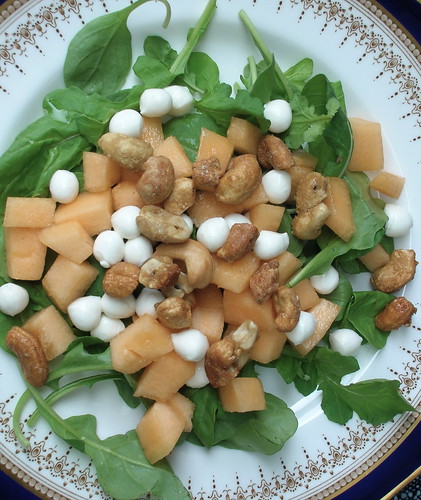
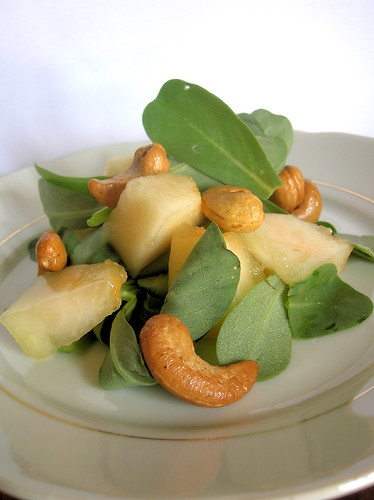
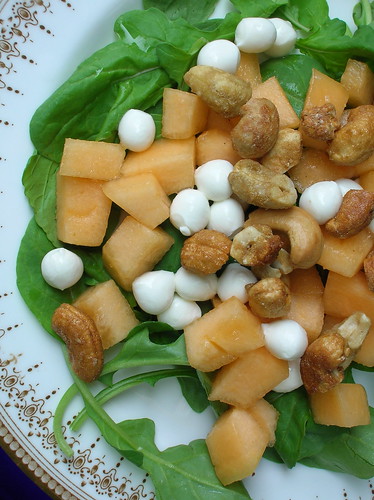
Summer Salad with Melon, Mozzarella, and Cashews

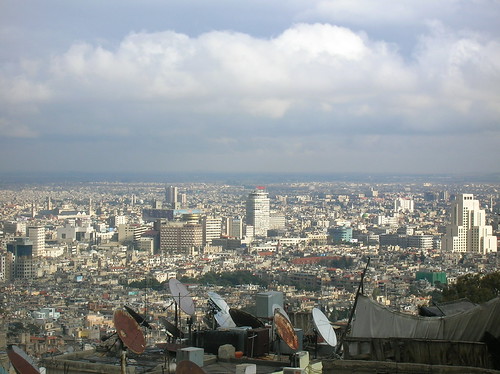
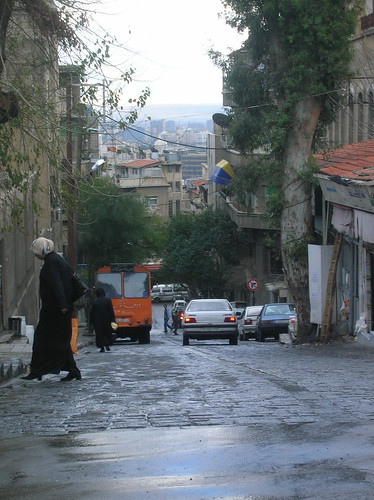
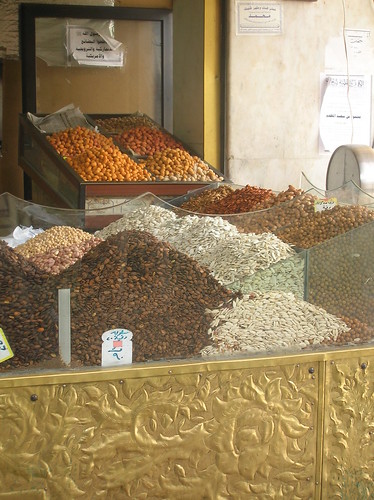
There are a lot of great things I love about my old neighborhood in Damascus, called Muhajereen. Nestled up into the mountain-side, it's got a fabulous market, well-priced rents and apartments that offer beautiful views. Muhajereen means "the immigrants," referring to immigrants from Crete that settled the area long ago, although these days the neighborhood is home to middle class families that have been in Damascus for hundreds of years. It boasts an ancient winding street with Mamluk-era buildings and a Sufi gravesite where local pilgrims come and bring picnic lunches to eat in the cool basement shrine. Bordering on Damascus’ chicest neighborhood, Abu Roumaneh, it's a short-walk to my office and nice shops.

the view

However, it's also a conservative neighborhood, and while that means there aren't many other foreigners around (a plus), there are also some minuses. Many women wear extremely conservative dress: black coats, stockings, black gloves, and a double black face-veil with no eye-holes. Before you ask: yes, it's difficult for them to see through it, and no, I don't have to wear a veil, Damascus women wear a wide range of dress based on personal decisions. But let's move on to that other negative, the complete absence of restaurants in Muhajereen. Conservative households always eat at home, together, and much of the structure of the day revolves around the family meal. So while there are plenty of take-out shops, juice bars, and ice cream parlors, including the best felafel stand in the whole city, there are no sit-down restaurants.


This brings me to why I love the Kurds. At the edge of Muhajereen, off a little side street across from the French embassy, is a bright pink sign reading "The Journalists Club." At one time it was a meeting place for journalists, but these days it’s just a slightly shabby restaurant and cafe. The walls are decorated with florid seventies-era wallpaper and gaudy swirled paintings; weak florescent lights reveal a clientele of older Arab men and a smattering of young ex-pats and Syrians. But what draws us is the single fact that the Journalist’s Club sells alcohol. Don’t get me wrong, I’m not a big drinker, but after a tough day navigating Damascus’ busy streets and bureaucratic struggles, a little glass of wine is a nice way to relax. Though wine and alcohol are available for purchase, the only restaurants and bars with alcohol are in the Christian neighborhoods, far across town from where we live.

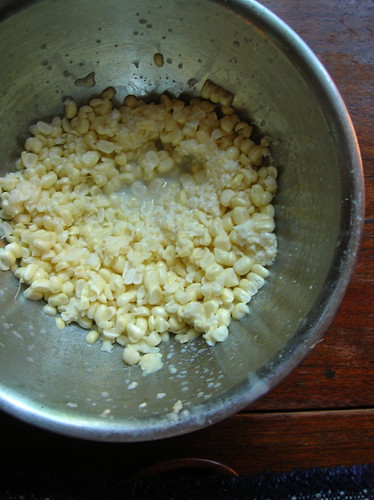
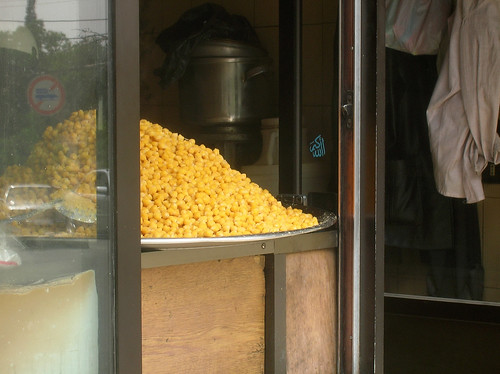
The Jounalists Club serves alcohol because it is run by Kurds. I have several Kurdish friends, and though everyone is extremely welcoming in Syria, the Kurds have a unique sense of joy and fun. The other thing that draws us to the Journalist Club is the laid back atmosphere: in a lot of trendy Damascene places it’s all about being seen, women with kohl eyes and men with too much hair gel, at the Journalists Club no one bothers you. And then there’s the cashews. They bring little bowls of roasted cashews to your table that are the most addictive wonderful nuts you’ve ever had. Walking down the hill one evening, Sara mused, “I hope they’ll have the cashews.” Sometimes the bowls are mixed nuts or popcorn, but we adore the cashews. There’s been many an evening I’ve whiled away with a group of expat friends, sipping Lebanese wine and eating one-too-many handfuls of cashews.

nuts please!

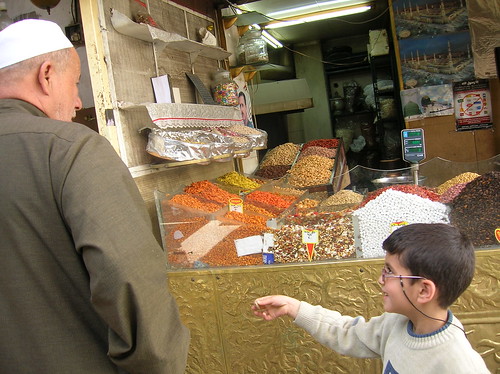
We’ve become friends with the Club’s owners, who told us they get the cashews from a little nut roaster not far from our appartment. Now we can get the nuts whenever we want, golden and hot, straight out of the rotating dark barrel. They rarely last the trip home, but I did manage to incorporate them into a lovely summer salad one day. The meaty cashews made a perfect pairing for the softest, sweetest summer melon, sort of like a play on the classic melon-ham pairing, except in a country without pork products. I used a soft herbal green that I have finally figured out is a type of purslane (anyone know a good source for Arabic/English herb translations?!). It’s worth looking for succulent purslane in your local farmers market, but you could substitute baby lettuces. Finally, tiny little balls of mild cheese round out the salad with a creamy note. It’s a wonderful salad I’ve made many times, but I always think of the jovial Kurds at the Journalist’s Club whenever I reach for the cashews.


Summer Salad with Melon and Cashews

3 handfuls purslane, or substitute baby lettuces or arugula
1 cup sweet melon, such as cantalope or charentais, diced
1/2 cup bocconcini (tiny mozzarella balls), or cubes of soft mild cheese
1/2 cup roasted salted cashews
lemon juice, olive oil, salt to taste

Combine the lemon juice and olive oil in a bowl. Add the purslane and toss to coat, then sprinkle with salt. Place the purslane on your serving plate, then arrange the melon, cashews, and cheese on top. Serve.

Variations: If you, like my mother, are deathly allergic to melon, you can substitute ripe peaches. Or if you, like my friend A., are allergic to nuts, you can substitute some slivers of Parma ham. If you’re allergic to melon, nuts, and dairy, well, maybe this isn’t the recipe for you.

29 July 2007

Snobless Hearts of Palm

When I was about sixteen I was in a dance company and we performed at some sort of gala or season opening, I can't remember precisely. I do remember they decided it would be nice to feed the dancers after we performed with some of the fancy dinner food the guests paid for with their hundred-dollar tickets. One of the girls in the company was, to put it frankly, a bit of a spoiled snob. I think her parents had underwritten part of the gala. We sat down to our first course, a salad with hearts of palm. "Have you ever had hearts of palm," she asked me, and I admitted I hadn't. When I asked what they were, she scoffed, "oh, they're very fancy, I don't know if you'll like them." Even at that age I was known to be a bit of a gourmand and a good cook, and I was mortified at my own ignorance.

I actually did enjoy the hearts of palm, but I've stayed away from them ever since. Eating them seemed like embodying the food snob I did not want to be, one of those people who goes on about truffle oil. I only ever prepared them once, on Valentine's Day as part of a "three hearts" salad (hearts of palm, artichoke hearts, and hearts of romaine). The salad wasn't as good as it was gimmicky, and so I pretty much wrote them off. Plus, there's the added issue of how they're harvested.

This was all before I met the grilled heart of palm, my new best friend. Many vegetables do well on the grill, but hearts of palm provide a wonderfully neutral palate for the smokey taste of the grill. All you have to do is get some hearts of palm (surprisingly inexpensive for a "luxury" item), toss them with some olive oil and balsamic vingar, and put them on a grill. You'll want a nice smokey charcoal grill, to give them lots of flavor. The balsamic caramelizes, the hearts of palm are tender; do this at your next barbeque, and I promise you they'll be the star of the show.

Oh, and that girl? She's a lawyer and married now. But my hearts of palm are still pretty tasty.


Grilled Hearts of Palm
Where I come from hearts of palm always come in cans, but if you have access to fresh, use them.

2 cans hearts of palm, drained and rinsed
3 tbl olive oil, plus more for the grill
4 tbl balsamic vinegar

1. Prepare your grill, you'll want it very hot. Combine the oil and vinegar in a bowl, then add the hearts of palm and toss to coat. Rub the grill with a little oil, then grill the hearts of palm, about 3 minutes on each side, so that they get nice char marks. Serve.
______________

27 July 2007

Corn Like the Summer of 1999


We spent two glorious weeks of vacation where the daytime climate hovered around seventy degrees and sunny and our evening appointments of sunset on the rocks called for jeans and heavy sweaters, wrapping shawls around our necks, we toasted the boats in the harbor with a glass of rosé the color of the pink, purple sky. Returning from vacation is always hard, but as we emerged into the 95 degree heat, the oppressive humidity, it seemed more like culture shock. I had forgotten that summer really was underway, “I’m melting, mom, I’m melting,” I cried as I worked to prop up plants in her garden. “Really, my nose is sliding down my face, I’m a Picasso painting.”

In this kind of weather, it’s hard to even work up much of an appetite, much less consider cooking anything. Entering the cool aisle of the grocery, I spied a sign that said local corn, and since sweet white Maryland corn is always good, I grabbed some of the fat heavy ears.

an armful

Talking with a friend later that week, my mother said in her Southern-tinged voice, “have you had any of the corn yet, why, it’s as good as the corn of 1999.” We both burst out in full-on belly laughs, but my mom was serious, and I knew just what she meant. The corn of the summer of 1999 is legendary in our family. That is the year we spent part of the summer at our friend’s beach house on the Eastern Shore. We’d go down to the local IGA, a ramshackle shed of a grocery, and get local corn and butter beans out of their wood crates. The corn was divine: fresh, sweet, wonderfully tender. We ate corn and beans for weeks, I don’t even remember anything else on the table. A man might rustle up some testosterone and put some fish on the grill, maybe some sliced tomatoes, but it was all about the corn. Tiny little Anne would eat 6 ears a night. “Can we do the butter thing,” Hollis would ask. This referred to rolling your hot corn over the stick of butter on the table, it’s the perfect way to coat an ear of corn, but also leaves tell-tale grooves in the butter, and so was not to be done in the presence of company. Much of dinner conversation was devoted to whether one ate their corn typewriter style or in the round.

We even endeavored to drive out into the country and find the reputed corn farmer, it was a bit like searching for the Field of Dreams, expecting his rows of tall ears to bear some tell-tale sign of their deliciousness. However, the corn appeared just like all those other fields we’d driven past, and the farmer was reticent to discuss his corn with a bunch of city girls. So we contented ourselves with eating, and that was good enough. Some people talk about vintages of wine and terroir, we talk about the years of sweet white kernels.

The corn this year has been just as wonderfully good. It’s got me thinking about how good Maryland corn is, all these years I’ve been eating adequate corn in other locales, I’ve learned to settle for less. I remembered a British friend who told me that corn was only considered food for livestock, and a Croatian friend who insisted corn had to be boiled for an hour (!) before being tender enough to eat. When you’ve got corn this good, it only needs a few minutes in boiling water and a thin swath of butter. Do not grill your corn in it’s husks, do not even think of using it for some other preparation, tender just-picked corn should be consumed as soon as possible, knawing away, butter and juices running down your chin.

In this spirit, I wasn’t even going to include a recipe today, but then I changed my mind and I’m giving you two. Even with the best corn, after about the tenth night of eating it you might want a little variation, so you can try different flavored butters to smear on your corn. And if you live in an area where corn is sub-par or out of season, I’m including my creamy corn recipe. This is so deliciously creamy, people will swear it’s full of cream, but it’s not. As for me, I’ve got corn on the cob, so I hope you all don’t mind if I do the ‘butter thing’ in your presence, because we’re all friends here.


Corn with Parmesan Black Pepper
I always thought corn on the cob should be graced only with the thinnest smear of butter and salt, until I met this version. Finely grated cheese clings immediately to the hot corn, adding a wonderful salty tang.

corn on the cob, preferably sweet white corn such as Silver Queen, shucked
very finely grated parmesan cheese, use a microplane or the finest part of a box grater
plenty of fresh cracked black pepper

1. Cook the corn in a large pot of boiling water until tender, a few minutes. Toss together the grated cheese and pepper in a bowl. Drain the corn and pat dry with a towel. Sprinkle a little cheese mixture over each ear of hot corn, rotating to coat all sides. Place on a platter and serve immediately.

Creamy Corn
The original title of this recipe was “creamless creamed corn,” but it’s too delicious to be thought of as lacking anything. If you’re serving it as a side dish at dinner, cook the mixture a few extra minutes so that it’s thicker and not runny. You can also use it as the base of a soup, I particularly like it topped with flakes of smoked trout and chile oil.

6 ears shucked corn
1 tsp salt
1 tsp cornstarch
1/4 cup chopped onion
1 tbl butter
1/3 cup water
a splash of cream, optional
2 tbl minced chives, optional

1. Working over a deep large bowl, cut the corn off the cobs and scrape the cobs with the back of a knife to extract the cob juices. You should have about 3 cups of corn.
2. Transfer 2 cups of the corn with their juices to a blender or food processor, add the salt and cornstarch and purée until smooth.
3. In a saucepan, sauté the onion in the butter until softened. Add the water and the remaining corn kernels and simmer for 2-3 minutes. Strain the corn purée through a sieve or mesh colander into the saucepan (you can skip this step, but it omits some of the annoying corn fibers). Add cream if using. Simmer the mixture a few minutes until thickened to desired consistency. Serve with chives.

25 July 2007

Tiramisu Ice Cream


As a kid, tiramisu was one of those desserts that adults always ordered if you went to an Italian restaurant. It didn't look terribly exciting, and it had the funny translation of "pick me up," which sounded about as stodgy as your Uncle Lou's paisley tie. Besides, if it was an Italian restaurant, that meant gelato was on order, so who would even contemplate anything else. Which is why I'd never had tiramisu until one day when I bought one at a Damascus cafe. Now, I realize Syria is not the place for one's first tiramisu experience, but it looked good and the pastry shop was a very reputable one. It was delicious, with fluffy filling, the bite of coffee and hint of chocolate.

Since then, I've had many more tiramisus (from more traditional sources), but I still love gelato, and this tiramisu ice cream is a perfect marriage of the two. In fact, it's one of my favorite flavors, and the best part is that all you do is put all the ingredients in a blender and blitz! Which means that you'll only have one dish to wash, provided you haven't licked it squeaky clean already.

In other ice cream news, I'm working on a little ice cream project for the month of August. I'm quite excited about it so I hope you'll stay tuned for the details!

Tiramisu Ice Cream
Two classic Italian desserts in one, this ice cream has the rich tang of mascarpone with hints of coffee liquer. Layering the ice cream with cocoa powder after you've churned it gives it beautiful stripes.

2 cups mascarpone (or 8 oz cream cheese plus 1 cup sour cream)
2/3 cup whole milk
2/3 cup cream
3/4 cup sugar
1/4 cup Kahlua (or substitute strong espresso)
1 tbl brandy or rum
pinch salt
1/2 cup cocoa powder

1. Place all the ingredients except the cocoa powder in the blender and blend until completely smooth. Transfer to the refrigerator and chill thoroughly (at least 4 hours), then churn in your ice cream maker according to the manufacturer's directions.
2. After you've churned the ice cream, transfer 1/3 of the ice cream to your storage container, then sift some of the cocoa powder over top, top with another layer of ice cream, sift with cocoa powder, and finally cover with the remaining ice cream. Store in the freezer.

Note: you can substitute 1 1/3 cups half-and-half for the milk and cream.
_________________________________

22 July 2007

Worth Every Flinch

soft shell crabs
If you had told my 16 year old vegetarian self that I would one day participate in removing the lungs from a living being, I don't think I would have believed you. I should say that my teenage vegetarian days were motivated not by any sense of ethical activism but rather by a strong distaste for most meats. As a child I recoiled from the steaks and chicken my mother tried to feed me, and even today I only eat meat about once or twice a month. However, I love seafood and will happily gobble down any creature of the sea, including spindly legged soft-shell crabs.

Soft-shelled crabs are not a kid-friendly food. There's the whole legginess of them, and then there's the issue of how they crunch. For any child reading Charlotte's Web, watching your parent crunch into a sandwich with legs hanging out of it can be a disturbing experience. Also, they are a bit confusing, something you normally eat only the inside of, it's kind of like being told to eat a banana with its peel. I grew up in crab-central Maryland and I can pick a crab like a pro, but I never had a soft-shell crab until a couple years ago. Now, of course, I love them. All the things that once seemed unappealing are part of their delight: the crunch that releases their salty brine, the sweet meat inside.

pan-fried soft shell crab

Usually, we just pan fry our soft shells with a little cornmeal coating (see above photo), but I got the idea for a tempura-fried soft shelled crab, and scuttled myself over to the grocery. "Do you have any soft-shells," I asked, not seeing any in the display. "Actually, we just got some in," the fish guy said with genuine enthusiasm, "but it will be a few minutes, I have to clean them." Having recently heard a friend talking about this rather tortuous process, I asked if I could watch how he did it. Now, the fish guy knows me, but he raised his eyebrow curiously, and that's how I found myself, a petite girl, behind the counter with a bunch of large men in butcher's aprons.

The crabs were still visibly alive, and we picked out four large males. "First, I cut off the eyes," he explained, as he took a large pair of scissors, and to my horror, did exactly that. Before I had recovered from that shock, he expertly lifted the shell edge and dug around and pulled out the crab lungs. "Actually, they're called gills," he told me. Right. He gave them a quick cleaning, snipped off the apron, and proceeded to the next crab. What was disturbing was that the crabs continued to twitch even after being defaced, much like the proverbial headless chicken. "They need to be alive up until the last minute, that's what keeps the shells soft," he explained.


As a child, we would catch our own crabs and take them home and steam them for dinner. The live crabs were put in a large pot and you had to hold the lid down firmly for the first minute as their claws banged on the pan trying to escape. One time a crab managed to get out and scurried after me, angrily pinching my toes as I ran circles in the kitchen until my mother plunked it back in the pot. This is all to say that I'm pretty comfortable with the idea that cooking involves a little gore. However, I did flinch when the crabs twitched again when I went to prepare them that evening. There is something about battering and deep-frying something that just adds insult to injury. Nonetheless, I proceeded.

As soon as the crabs were on the plate, I knew they were worth every flinch. The crabs were divine. Each crunchy bite is an explosion of salty brine combined with buttery-sweet meat. There's just no other way to put it, this has to be one of the best meals of the summer. They were so good, I wasn't going to write anything about the process of prepping them for fear it would scare someone away from making them. I was just going to write about how good these are, you have to make them. Luckily, if you have access to soft-shells, they may be sold already cleaned or your fish monger will clean them for you, sparing you any gore. But somehow, I think learning about them made me appreciate each bite even more. All you have to do is cook them up, which makes this one of the best 10-minute meals I can think of.


Tempura Soft-Shell Crabs
Crunchy, salty, sweet, soft-shell crabs are a special delight. Your fish monger will clean the crabs for you, but you may also want to reach under the shell and scrape out the bright yellow crab guts, called the tomalley. Soft-shells are in season May-July.

4 soft shell crabs, cleaned
1 cup very cold mineral water
1 cup flour (preferably rice or cake flour, but all-purpose is fine)
pinch each of salt and Old Bay seasoning
oil, for deep frying

1. Heat the oil in a large, deep pot. Combine the flour in a bowl with the salt and seasonings. Add the water all at once and stir just to combine. The batter should still remain slightly lumpy, do not overmix.
2. Test that the oil is hot enough by drizzling a little of the batter into it, it should bubble up and fry. Dredge the crabs in the batter, then add to the hot oil. Fry until golden and crispy, about 3-5 minutes. Remove with a slotted spoon and drain on paper towels. Serve immediately.

Gild the Lily: Serve the crabs with a little aioli or mayonnaise sauce drizzled on top.

See also:
French Laundry at Home cooks soft shells.
Cleaning Soft Shell Crabs
_____________________

20 July 2007

Just Brilliant.

berry meringues
This is brilliant people, just brilliant. This is what you’re making for your next dinner party. Put away the thoughts of the fancy cake you were going to concoct (like you have the time!) or the dessert you were going to purchase (homemade is better!), this is what you’re making.

I’ve had it on my mind to make a pavlova for quite some time now, it seems everywhere I turn people are raving about them. But the problem is it’s been terribly humid here, not the weather conducive for making a delicate meringue at all. Plus, it’s equally hot, and the thought of firing up the oven is enough the inspire rivulets of sweat on my forehead. And what’s even more pathetic is that I have been practically pouty at the thought of the pavlova I cannot make, and yet too lazy to really do anything about it.

Wandering morosely through the grocery, I eyed the berries perfect for a pavlova (sigh), but laziness took over, and when I spied a box of meringue cookies, I bought those instead. It was only a couple days later, as the box of meringues languished in the pantry, that inspiration struck.


This dessert takes all of 5 minutes, which is it’s brilliance. Ok, I’m exaggerating, it might take you ten. Simmer some berries just until they are softened, a couple minutes. Now, slice off the pointy tops of the purchased meringues, then dollop them with a little dab of sweetened sour cream. I like sour cream because it’s thick and tangy and you can use a fat free version, but you could also use whipped cream. Now, add a few of the berries on top. That’s it! These are best if you let them sit for a few hours, so that the cream melds into the meringue, perfect for making ahead.

These are like tiny little handheld pavlovas, perfect for dinner parties or buffets, elegant and easy. Or you can eat them on an average night at home and wander around pretending you’re a celebrity: “look, I’m eating a gorgeous little handheld dessert, I made it myself,” smile, wave. See, I told you it was brilliant.


Easy Miniature Pavlovas

12 purchased meringue cookies
1 cup sour cream (low fat or fat free is fine)
1/4 cup confectioner’s sugar
1 tsp vanilla
1/2 cup small berries
1 tablespoon granulated sugar

1. Place the berries with the tablespoon of granulated sugar and a couple tablespoons of water in a saucepan. Simmer the berries just until softened and slightly juicy, about 3-5 minutes. Set aside.
2. Cut off the top points of the meringues. Combine the sour cream with the powdered sugar and vanilla. Place a dab of sour cream on top of each meringue. Top each with a few berries. Best if refrigerated for 2-8 hours before serving.
_________________

19 July 2007

An Answer, in Soup Form


My mother has a tendency to ask rather odd questions at random moments. This may be endearing to her friends, but in the unique position of a daughter, I have the special ability to turn just about anything into an embarassment. The other night she mused, "I think I'll give up electricity. I'll buy a house without power." Umm, "Mom, this is the part where I roll my eyes at you." When traveling on our recent vacation there were plenty of opportunities for random observations and quotable quotes, including, "if you were the first colonist to sail up the Chesapeake Bay, what do you think you'd eat?" Out of nowhere, I kid you not.

"Well," I said, "crabs. And corn." I tried to channel Rachel Carson and think of the bounty of the Chesapeake several hundred years ago, before the menhaden all died. But my mother's question had also sparked another inspiration, albeit a more trivial one. I'd been puzzling around an idea for a Thai-style curry in my head, some kind of coconut milk stew, but I couldn't figure out what components I wanted. Aha, I thought, why not take those traditional Maryland ingredients, corn and crab, with coconut they'd be perfect together.

My instincts were right, and the marriage of ingredients are sweet, creamy, with a hint of spice. This is the perfect use for sweet summer corn, and though it takes a little bit of prep-work, the flavor is worth it (I do, however, give a shortcut version below that's good in a pinch). I know crab meat is expensive, but it stands out here, whether ladled into deep bowls or draped luxuriously over rice. If you want, I imagine some halved cherry tomatoes or sautéed red peppers would also be good, and add some acidity to balance the sweetness. In the end, I decided this is more summer-time stew than Thai-style curry, but no matter what you call it, it's sure good, so maybe mom's questions are useful afterall.


Corn, Crab, and Coconut Stew
Don't be fooled by the use of the word stew, though this dish is thick and satisfying, the sweetness of coconut and corn and wonderful lumps of crab mean it's perfect for summer. If you have access to good fresh corn, it's worth it to make the full-scale version, but if you're in a pinch check out the cheat's version below. Serve in bowls with a green salad on the side or serve over rice.

1 teaspoon butter
1/2 a large sweet white onion (such as Vidalia), diced
1 tablespoon minced lemongrass (optional)
1 1/2 cups coconut milk
6 large ears sweet white corn, or 4 cups corn
2 cups (12 oz) lump crab meat
salt, to taste
Aleppo pepper, red pepper, or chile sauce, to taste
1 tsp lime juice

1. Shuck the corn. Working over a deep bowl, cut the kernels from the cobs, then scrape the cobs with the back of your knife to get the remaining corn juices. You should have about ~4 cups corn. Transfer half the corn kernels to a food processor and pulse until you have a chunky puree. Add the puree back to the bowl with the corn kernels.
2. Melt the butter in a saucepan, add the onion and lemongrass and sauté until softened, about 5 minutes. Add 1/2 cup water to the pan, stir to deglaze the bottom of the pan, then add the coconut milk. Stir in the corn mixture and season with salt. You may want to add some more water to adjust the consistency of the soup. Bring to a boil, then lower the heat and simmer until thickened and combined, about 5 minutes. Stir in 1 1/2 cups of the crab meat and season with red pepper and lime juice. Ladle into bowls, then mound reserved crab in the center of each bowl. Put a few drops of hot sauce on each bowl if desired. Serve immediately.

Optional Additions: Try adding some halved cherry tomatoes or diced sautéed red peppers or minced basil leaves.

Cheater's Version:
1/2 an onion, diced, 1 can coconut milk, 1 can cream-style corn, 1 cup corn (preferably cut fresh from the cob), 1 1/2 cups lump crab meat, hot pepper and lime juice to taste

Sauté the onion in a little butter or oil until softened. Add the coconut milk, cream-style corn, and corn kernels and season with salt. You may want to add a touch of water to adjust the consistency of the soup. Simmer about 5 minutes to combine. Stir in the crab and season with red pepper and lime. Serve.
_______________

16 July 2007

Coconut-Mango-Lime Parfaits


Sometimes, the best things happen by coincidence, or in this case leftovers. Ok, actually, it was leftovers, twice-over. I should be a little sheepish about saying that but, really, this dessert is so good, you should be happy I'm sharing it with you at all. I could just run away and hide in the closet and eat it all and never tell you about it, but I'm letting you in on the recipe (leftovers and all).

I made some Thai food the other night and had leftover coconut milk and limes. I bought key limes because I'll admit I don't really like limes much, they can be terribly bitter and astrigent. However, limes also have a unique flavor that marries perfectly with certain dishes, like mojitos and Thai food and coconut, in those cases I choose key limes because they are sweeter and fleshier. Of course, key limes also bring to mind the eponymous pie, filled with a key lime custard.

I had already combined the leftover coconut milk with whipped cream as a sweet topping for cherries, but then I had leftover coconut cream. So, I'm standing at the fridge, trying to figure out what to do with the already reincarnated coconut, the key limes, thinking coconut, key lime pudding, maybe some fruit, mangos, bingo! That's how I came up with the idea for these parfaits, tall layered glasses of coconut cream, lime pudding, and mango.

And even though these look impressive and taste even more so, all I had to do was make the pudding and layer everything in glasses, easy. The product of leftovers never tasted so good, and the key lime pudding is terrific on its own. The only thing I would add would be if you want a little crunch in there, some toasted chopped cashews or sesame brittle might be nice. Eitherway, these are cool, creamy, fruity, tart, sweet and terrifically redolent of the tropics, the perfect thing for summer. You can even come out of the closet and eat them on your porch, provided you've made enough to share.

Ooh, and think you need fancy glasses to serve these in? Think again, I used plastic Solo cups, yeah, I'm admitting that too.


Coconut-Mango-Lime Parfaits
These cool, creamy parfaits taste of the tropics. The key lime pudding is fabulous on its own, but paired with coconut whipped cream, mangos, and a hint of rum, it's even better.

coconut whipped cream:
1 can coconut milk, refrigerated*
1 cup heavy cream
2 tbl powdered sugar
1 tsp vanilla
key lime pudding:
3/4 cup sugar
3 tbl cornstarch
pinch salt
2 1/2 cups milk
1 egg, lightly beaten
1/2 cup fresh key lime juice*
1 tbl butter
mangos:
1 large mango
1 tbl coconut rum, optional
optional additions:
toasted cashews, crystalized ginger, sesame brittle or toasted coconut

1. For the lime pudding: Combine the sugar, cornstarch and salt in a saucepan. Add the milk and whisk until smooth. Place the pan over medium heat and cook, stirring constantly, until very warm but not boiling. Beat the egg together in a small bowl, then add a little bit of the warm milk mixture to the egg and stir to combine. Add the egg to the saucepan with the milk and return the pan to the heat. Cook over moderate heat, stirring constantly, until the mixture is thick enough to coat the back of the spoon (be careful not to curdle it). Remove from the heat and stir in the lime juice and butter. Strain the mixture through a fine-mesh sieve into a bowl. Press plastic wrap directly on the surface of the pudding and refrigerate until ready to use.
2. For the coconut whipped cream: Open the can of coconut milk and scrape off the top layer of solidified coconut cream. Place in a bowl with the heavy cream, powdered sugar, and vanilla. Whip the mixture until it holds stiff peaks. You can fold in a few more tablespoons of coconut milk if you'd like. Refrigerate until ready to use.
3. For the mango: With a vegetable peeler, peel the mango, then continue with the peeler, shaving thin strips of mango into a bowl, working around the center pit. If the mango seems fibrous you can also use a knife and finely dice the mago, whatever works for you. Add the rum to the mango and stir to combine.
4. To assemble: Place some of the mango in the bottom of four glasses. Add some of the lime pudding, then some of the coconut cream. Sprinkle over any of the optional additions like toasted chopped nuts. Repeat the layers. Refrigerate until ready to serve.

Cheater's Version:
Substitute purchased lime curd (available next to the jams in most groceries) for the lime pudding. Then all you have to do is whip the cream, slice the mangos, and layer everything in glasses!

*When you refrigerate coconut milk, the thick coconut cream will solidify on top. I like to scrape this off and use it in sweet applications (you can even whip it like cream), and use the remaining coconut milk for savory uses like curry. However, you can also just fold regular coconut milk into already whipped cream. Also, if fresh key limes are unavailable, substitute bottled key lime juice or 1/4 cup regular lime juice.
_____________

14 July 2007

Making Tabbouleh


All over Syria and Lebanon, women are chopping parsley. The quiet rhythm of their knives, swish, swish against the cutting board, slicing bunches of verdant green leaves, part of the rhythm of the region. Tabboule is considered the national dish of Lebanon and the pride of Syrian cooks, a salad of bright green parsley flecked with tomatoes, bulgur, mint and lemon. Part of the pride of tabboule is the labor it takes to make it, the parsley must be chopped by hand (a food processor bruises the parsley too much), and it takes a lot of chopped parsley to make even one serving of tabboule. So having someone over for tabboule is a special occasion and an honor- I love this idea, when was the last time someone invited you over where the celebrated dish was salad, when have you seen pot-bellied men clap in delight at a bowl of greens?

When I would make tabboule with Umm Hana, we'd spread a cloth and sit down on the floor and set to work chopping, often working several days ahead of time. Children would run in and out as we chopped and chatted, drinking tea, neighbors or friends might stop by to visit and even join in the labor. A good bowl of tabboule is a delight, whether gulped lustily with a spoon, scooped with elegant lettuce leaves, or eaten with thin pita bread, squeezing the bread to absorb the lemony dressing.


This is a continuation of my discussion about misappropriated Arab foods, last time we talked about hummus, and I want to thank everyone for their passionate responses, I loved hearing your experiences. Now, we're talking about the even-more-maligned tabboule, which so often marauds as a bulgur salad in the West. No, no, no, I want to shriek, tabboule is parsley salad with just a little bit of bulgur. Now granted, there are regional variations, and there is a 'Turkish tabboule' which is primarily bulgur, but tabboule is not synonymous with bulgur salad. Here are some tips for making traditional tabboule:

- Parsley should remain the primary ingredient, not bulgur.
- The parsley should be chopped by hand (I give tips on how to do this below).
- Use a generous amount of olive oil- you need a lot of oil to coat all those little parsley pieces, and don't balk, it's good for you (besides, parsley's a diuretic). You'll also need a complimentary amount of fresh lemon juice, there should be a bit of dressing floating in the bottom of the dish (great for smushing your bread into).
- Traditionally, there is no garlic in tabboule. Also, no cucumber or red peppers please.
- Tabboule is best when served about an hour after it's made- it needs time to rest for the parsley to soften, but if you wait too long it well get soggy.

When I first came to visit my mother after living in Damascus for a year, she joked that I was always chopping herbs in my spare time. She was right, I'd snatch a bit of down time to chop the parsley for that salad I so craved. Sometimes, I'd buy a box of prepared 'tabboule,' then buy a big bunch of parsley, chop it up, and stir them together with some extra lemon juice. I still like chopping herbs, the soothing rhythm of it, the smell of freshness. So if you want tabboule, I'd suggest you sharpen that knife and get to work, there's chopping to be done.

I'd like to point out that the parsley, mint, and tomatoes in the above photo were taken from our garden, talk about a home-made dish! And as always, your own comments and experiences making and eating tabboule are welcome!


Tabbouleh
With a little experience you can estimate the quantities of ingredients by eye when making tabbouleh. However, because bunches of parsley and the size of tomatoes can vary greatly, I give measurements in cups here to ensure the proper ratio of ingredients.
Bulgur is available in the grocery next to the couscous and rice, it is often in a box labeled 'tabboule mix.' You can also find bulgur at your local ethnic market, where it will probably come in grades of coarseness, you want grade 3 or 4.


1/2 cup coarse bulgur
5 cups finely chopped flat-leaf parsley (see instructions)
1 cup finely chopped scallions
1 1/2 cups diced tomatoes
1/2 cup finely chopped mint leaves
3/4 cup lemon juice
3/4 cup olive oil, or more as needed
salt, pepper, and allspice to taste

1. To chop parsley: Sharpen your knife. Gather several stems of parsley in your hand. Pull the stem ends down so that all the leaves are clustered evenly together (see photo). Gather the leaves closely together and press against a cutting board. Holding the leaves in place with your left hand, use your right hand to very thinly slice the parsley leaves. Once you've chopped that bunch, you can go back and chop a few remaining big pieces, but avoid going back over the parsley, as further chopping will result in bruised leaves. Continue with remaining parsley, placing chopped leaves in a bowl. This can be done over 1-2 days, storing parsley in the refrigerator.
2. Bring 1 cup of water to a boil. Pour over bulgur in a bowl and let sit at least one hour, until softened.
3. In a large bowl combine the parsley, scallions, tomatoes, and mint leaves. Fold in the bulgur. Stir in the lemon juice, olive oil, salt, pepper, and allspice to taste. Refrigerate for 1/2 hour to one hour before serving. Serve with small lettuce or endive leaves as scoops.

See also: Clifford Wright's Tabboule
__________________

12 July 2007

Hummus Dilettante


In general, I am fairly open to different interpretations of dishes, I am not one of those pedants who will tell you couscous must absolutely be made in a special clay pot, or pasta has to be made with just that flour. However, having lived in the Middle East, there are some offenses committed against Middle Eastern/Arab foods that really get under my skin. To name two basic staples: hummus and tabboule. My irritation stems less from the misappropriation of these dishes, but rather that these dishes are so good when properly made that people have no idea what they are missing.

Let's start with that ubiquitous staple: hummus, or it's full name hummus bi tahine. But first let me reveal something: few people living in Middle Eastern cities make their own hummus. They buy it, from hummus vendors, often called hamsani. Just like the French purchase their croissants and Italians buy much of their pasta, Levantine cities have hummus shops on every corner. These shops sell freshly cooked chickpeas, hummus, and dried fava beans called foul. There's usually a few little tables or a counter to eat a bowl of hummus and a takeout counter where hummus is sold by weight in plastic bags. Now, let's get to some of the qualities of good hummus:


One of the important attributes of hummus is that it is a smooth consistency, which is where many attempts at hummus fail. The traditional tool for this is a food mill, but a food processor or blender can work equally well. Another key to the smoothness of your hummus is the chickpeas themselves: the chickpeas should be cooked so that they are meltingly soft and the outer skins have fallen away. In fact,, I really find that the best, smoothest hummus comes when you peel the chickpeas. And yes, this sounds crazy, but it really doesn't take much time (you just sort of pinch them and they pop off) and it makes a vast improvement in the texture of your hummus.

Secondly, the word hummus means 'chickpea.' You are free to mix many things into your hummus, but the base ingredient should remain chickpeas. Not white beans, not red peppers, not olives nor beets. It's totally fine if you use these things, but please use a name other than hummus. There are lots of good variations on hummus that I've listed below.

I've always said one of the keys to Arab cooking is the copious use of lemon juice in everything, and that holds true for hummus. Fresh lemon juice is best. Also, garlic and spices shouldn’t overwhelm, but this can vary on personal taste.

Finally, there is the issue of presentation. This also ties in to the above issue of consistency- your hummus should not be chunky or thick enough to make a mound (see: yes, yes, and no, no). You don't have to be perfect here, but choose a wide flat bowl or plate to serve your hummus. A drizzle of olive oil in the center is traditional, and you can also decorate with spices or chopped herbs.

I realize that this makes me sound like a total hummus dictator; I like to think of it as more of a hummus dilettante. But here’s what I’m saying: with all the rhetoric going around about a better understanding of the Middle East, let’s at least get the hummus right. After all, it’s a dish that’s been perfected over thousands of years, so get to know the classic version. I also realize a lot of people out there have already had these revelations, perhaps at their local Lebanese restaurant, or in their own kitchens and if you have any of your own tips or experiences, please feel free to share them in the comments.


Hummus bi Tahine
Although hummus is best made with freshly-cooked chickpeas, sometimes time and convenience mean that canned chickpeas are an acceptable option. Please also note the directions for making hummus in a food mill at the bottom. Don't be alarmed by the length of this recipe, I'm merely verbose, it's really quite simple.

3 cups cooked chickpeas, from 1 1/2 cups dried chickpeas, or 2 (15 oz) cans
1/2 tsp salt
1 garlic clove
1/2 cup tahini (sesame seed paste)
1/3 cup lemon juice
olive oil, parsley, paprika or cumin for serving

1. For dried chickpeas: Soak the chickpeas overnight in water. Drain, and place chickpeas in a pot and add fresh water to cover by at least one inch, gently rub the chickpeas against each other with your hands. Bring the chickpeas to a boil with a pinch of salt, skim the surface, then lower the heat and simmer until the chickpeas are tender, about 1 1/2 hours. If you are peeling the chickpeas, allow them to cool slightly and then peel them, pinching off the skins. Do not discard the cooking water.

For canned chickpeas: Rinse the chickpeas, then place in a saucepan with water to cover by one inch. Put your hands in the pot and gently rub the chickpeas against each other. Place saucepan on the stove and bring to a boil and simmer until chickpeas are very soft: test a chickpea by squeezing it between your fingers, it should smush easily, this could take between 5 and 20 minutes. Remove from the heat, skim off any chickpea skins that have floated to the surface and discard them. If you are peeling the chickpeas, allow them to cool slightly and then peel them, pinching off the skins.

2. Place the garlic and salt in a food processor and pulse to chop. Add the tahini and lemon juice and process until the mixture is slightly whitened and contracted. Use a slotted spoon to transfer the chickpeas to the processor (don't discard the cooking liquid) and process until very smooth. Thin the hummus to the desired consistency with the reserved cooking liquid. Taste and adjust seasoning with lemon juice and salt.

4. Make ahead: if you are making your hummus ahead of time, or don't plan to serve it immediately, the hummus will thicken up and stiffen as it sits. I recommend leaving the hummus in the bowl of the food processor until you are going to serve it (refrigerating overnight if necessary), and reserving some of the chickpea cooking liquid. Then, when you're ready to serve the hummus, simply process the hummus with a bit more cooking liquid to achieve the desired consistency. On the up-side, if you accidentally made your hummus too thin the begin with, then pop it into the fridge to thicken up a bit.

5. To serve: spread hummus in a shallow bowl, drizzle with olive oil and sprinkle with spices if desired. Traditional accompaniments include pita bread, pickles, fresh mint, and hot tea.

Variations:
- Hummus with Meat: In a pan, sauté some ground beef in a pan with a pinch of allspice and cinnamon until well browned, about 5 minutes. Crumble into small bits and scatter the meat over the hummus. You can also add diced onion and pinenuts to the meat mixture.
- Hummus Beiruti: Stir a large handful of chopped parsley into the hummus before serving.
- Hummus Musabahha: This version of hummus leaves the chickpeas somewhat chunky.
- Hummus bi Zeit (Hummus with oil): replace the tahine with olive oil. Please note that hummus is rarely made with both oil and tahini in the puree, it's either hummus with tahini, or hummus with oil, though olive oil is drizzled on top of both for serving.
- Warmed Hummus: Spread hummus in a shallow baking dish and bake until warmed through.
- Hummus bel Snoobar (Hummus with Pine Nuts): Sauté pine nuts in a generous spoonful of clarified butter. Pour the butter and toasted pine nuts over the surface of the hummus.
- Hummus Akhdar: Add in roasted red peppers and pomegranate molasses for a beautiful sour-sweet hummus. 
- Hummus bi Sujuk: Sujuk is a traditional (and delicious!) Lebanese-Armenian beef sausage. Serve hummus topped with sauteed sujuk, or other sausage of choice.

*Also Note: I give instructions for using a food processor here, because I find it is most convenient in the modern kitchen, but the traditional way is to use a food mill: purée the chickpeas in a food mill. In a mortar and pestle smash together the garlic, salt, and lemon. In a large bowl, stir the garlic-lemon mixture into the tahini so that it lightens in olor and contracts slightly. Add the chickpea purée to the tahine mixture, adjust seasonings. Pass through a food mill one final time to combine. This traditional way produces the best, smoothest hummus in my opinion.

11 July 2007

Housekeeping

A few housekeeping things around the Desert Candy abode today: It was only through some nice reader comments that I even knew I was a 'Blog of Note,' and I want to express my sincere gratitude to whoever has been reading along and making note. It's nice to know there's someone out there other than my mother. I want to welcome all the new readers and I hope you'll stick around and keep sharing your brilliant insights and random thoughts, I'm flattered to hear from all of you. Due to the uptick in comments, I had to enable the 'moderate comments' feature in order to prevent spam, but I hope that won't deter anyone from commenting in the future!

I also noticed when I was doing some cleanup in the recipe section that Desert Candy is seriosuly lacking in the soup section. How could this be, since I adore soups and make them often?! I love smooth pureed soups and I usually make them with whatever I have on hand, carrot ginger is a favorite, or a chilled vichyssoise or tomato bisque. Since I wouldn't dare leave you without a recipe, I did a little cleaning of my own, and found this chickpea soup I made back in the winter, topped with cumin oil. This soup is easy as can be (in keeping with today's clean out the pantry theme) and absolutely delicious. And now back to regularly-scheduled programming...

Creamy Chickpea Soup with Cumin Oil
This soup is best when made with fresh-cooked chickpeas, but you can use canned also.

3 1/2 cups cooked chickpeas with their liquid
half a medium onion, chopped
1 garlic clove, smashed
1/2 cup cream or milk, optional

1 teaspoon cumin seeds
3 tablespoons extra virgin olive oil

1. Place the chickpeas with some of their liquid in a pot with the onion and garlic. There should be enough liquid to cover the chickpeas, add water or chickpea liquid as necessary. Bring the mixture to a boil and season with salt and pepper. Lower the heat and simmer for 15-20 minutes, replenishing water as necessary.
2. Meanwhile, make the cumin oil. In a dry skillet, lightly toast the cumin seeds until just fragrant. Remove from the heat and grind in a coffee grinder or crush with a mortar and pestle. Heat the olive oil in a skillet until shimmering, add the ground cumin, swirling to combine, and remove from the heat.
3. Puree the chickpea soup in a blender until smooth. Add more water or some vegetable broth to thin the soup to your desired consistency. (If you are really picky, you can also press the soup through a sieve or tamis to ensure it is super-smooth). Stir in the cream, if using. Taste for seasoning, add salt or pepper if needed. Ladle the warm soup into bowls, swirl the cumin oil over top.
_____________

08 July 2007

Of Bunny-Topped Cakes and Birthdays

There are recipes that every family keeps close to their hearts. Sometimes they are the source of mystery and intrigue, the ingredients closely guarded, the procedure taking days. "I heard she stirs counterclockwise for hours without stopping," someone might whisper at the table. Then there are recipes that just slip themselves into your lives and acquire the comfort of a well- worn tee-shirt. They may not be complicated but the smell wafting from the kitchen is the smell of home. This is one of those recipes.


The year I was born, Gourmet Magazine published a feature for a children’s birthday party, which included little croque-monsieur sandwiches and a carrot cake topped with marzipan bunnies. My mother saved the article and for my birthday party she made the carrot cake, 3 layers sandwiched with apricot preserves and covered in cream cheese frosting. She even crafted little bunnies to sit on top of the cake with tufts of carrot tops for grass, and marzipan carrots to go around the sides. The cake was such a hit, she made it the next year, and the year after that, and after that...

For my entire life I have celebrated my birthday with the same exact cake. Ok, well, there was one year when I was about eight and insisted on an ice cream cake, but that was only a temporary moment of rebellion. I am, after-all, a creature of habit. When I went away to camp for the first time, my mother made sure a carrot cake was delivered to my dormitory. After scouring Beirut bakeries for days, I conceded carrot cake was unheard of in the Middle East and attempted to make my own in a very tiny kitchen with a broken oven. These days I make my own birthday cake and even though I am way too old for a cake decorated with small animals, I still make them if I have the time, resulting in many late nights sculpting marzipan and some funny reactions from friends. However, if you make fun of my cake, you may not get any, and then you will be very sorry.


The folded, stained issue of Gourmet is a testament to the strength of the recipe (it's also a prized possession, since Gourmet's online archives don't go back that far). Despite my fiddling with the measurements, I still make it generally as written, at this point I know it by heart. Everyone has their own idea of what carrot cake should be, but for me, this is it. Chock full of carrots (a full 4 cups), absolutely no pineapple or raisins. The cream cheese frosting recipe always makes too much but I make the whole amount everytime, and steal spoonfulls from the fridge all week. Hey, it’s my birthday after all. This year, here I am once again, grating carrots, stirring batter, the smell of warm cinnamon reminding me of the inevitable passing of years. So here’s to twenty-ahem years and counting, may there be many more bunny-topped cakes to come.


Carrot Cake for Birthdays
I've had this exact cake for my birthday for almost every year of my entire life, if that isn't tried and true than I don't know what is. My mom always used carrots with their tops still on because she said they were fresher and the carrot tops could be used as garnish, but I'll admit I just use regular carrots as long as they are fresh. And yes, I still sculpt the marzipan bunnies, too. Adapted from Gourmet.

2 cups flour
2 cups sugar (I prefer brown, but white sugar is fine)
2 tsp baking soda
1/2 tsp each cinnamon, allspice, nutmeg
1/4 tsp cloves
1/4 tsp salt
4 eggs
1 cup vegetable oil
4 cups grated carrots
1/2 cup walnuts, optional (I never include them, but if you want to...)
to assemble:
1/2 cup apricot jam
cream cheese frosting (recipe follows)
marzipan and food coloring for bunnies, if desired

1. For the cake layers: Preheat the oven to 350 F. Line 3 eight-inch round pans with wax paper, grease and flour the pans.
2. Sift together the flour, sugar, baking soda, spices, and salt. In a large bowl, beat the eggs until frothy, then add the oil in a stream, beating to combine. Gradually stir in the flour mixture just to combine. Fold in the carrots.
3. Divide the batter between the 3 prepared pans, bake for 25-30 minutes, or until a toothpick comes out clean. Let cool in pans for 10 minutes, then invert onto a rack to cool completely.
4. To assemble: Peel the wax paper away from the bottom of the cake layers. Place 1 cake layer on a platter and spread with half the apricot jam. Top with a second layer, and spread that with the remaining jam. Top with the final cake layer. Frost the top and sides of the cake with cream cheese frosting. If desired, sculpt bunnies and carrots out of marzipan. Arrange bunnies around top of cake, with carrot tops as grass, and place carrots around side of cake.

Cream Cheese Frosting
Some of the best stuff on earth. Using cold cream cheese and softened butter prevents any lumps.

1 lb cream cheese, cold
1 stick (8 tbl) butter, softened
4 cups confectioners sugar, sifted
2 tsp vanilla

1. With an eletric mixer, beat together the cream cheese, butter, and vanilla until smooth and combined. Add the powdered sugar in 3 additions, beating only until sugar is incorporated (do not overbeat). Store in the refrigerator.

*Alterations: Over the years I fiddled with this recipe many times and if you're watching your calories I have found it is plenty moist with only 3/4 cup oil and with the sugar reduced by 1/4 cup; also whole wheat pastry flour does very well.
_____________

04 July 2007

Cheater, Cheater ... Sticky Bun Eater

sticky bun remains
I am not a morning person. I need a good half hour between waking up and engaging in conversation any more complicated than yes or no. I do not wake up and hum as I brush my teeth. And as much as I love breakfast food, I don’t much like cooking in the morning. I usually wake up with an appetite, and getting food in my system is generally part of the successful road to a fully functional, conversational me. Having to undertake any labor more serious than stirring or waiting by the oven for toast can be a recipe for disaster.

Growing up, Sunday mornings meant something special for breakfast, like cinnamon rolls or raspberry crumb cake. And as wonderful as those gooey, pull-apart cinnamon rolls are, they involve yeast, and work, and worst of all, waiting. Get up early to let dough rise (an hour!), roll it out and bake it (another hour!)? Hello, the weekend, sleeping in? The hungry-grumpy me that would result is a picture no-one wants to see, besides I probably would have resorted to eating a bowl of cereal an hour ago. Of course, one could always go out for breakfast, which would probably involve long lines and more waiting, boisterous children, and mediocre toast. And I’d have to get dressed.


So what’s a girl to do? Well, she makes ‘quick cinnamon buns,’ a happy marriage of biscuit-like dough in cinnamon roll form. No yeast involved, just a quick stir of ingredients and they’re in the oven before you know it. These don’t quite have the luscious pull-apart texture that comes from yeasted dough, but that doesn’t mean they aren’t good. And I’m not complaining because I am sitting at home, in my pajamas, eating a homemade cinnamon bun, warm from the oven.

Quick Cinnamon Buns
The comfort of a homemade cinnamon bun without the wait for yeasted dough, what could be better? You could also add raisins to the filling if you'd like.

2 cups flour
2 tablespoons brown sugar
1 tsp baking powder
1/2 tsp baking soda
1/2 tsp salt
4 tbl (2 oz) butter, melted
3/4 cup buttermilk

filling:
1/4 cup brown sugar
1 tbl cinnamon
tiny pinch of cloves

glaze:
2 tbl cream cheese
2-3 tbl milk
1 cup powdered sugar

1. Preheat the oven to 425F. Grease an 8-inch square pan. In a large bowl, stir together the flour, brown sugar, baking powder, baking soda, and salt. In a glass measuring cup combine the butter and buttermilk. Make a well in the center of the dry ingredients and pour in the wet ingredients. Fold the mixture together in a few swift strokes, stirring only until combined. Transfer the dough to a lightly-floured work surface and roll to a rectangle about 10x18 inches.
2. Combine the filling ingredients and sprinkle them over the surface of the dough. Starting from the short side, gently roll up the dough. Cut the dough into 2 inch lengths, you should have about 8-9 rolls. Snuggle the rolls together in the prepared dish and bake for 20-25 minutes.
3. Stir together the glaze ingredients and drizzle over the rolls.
________